DIY Paddle Boat For Kids (Video)
Water science experiment is always a hit for the kids.
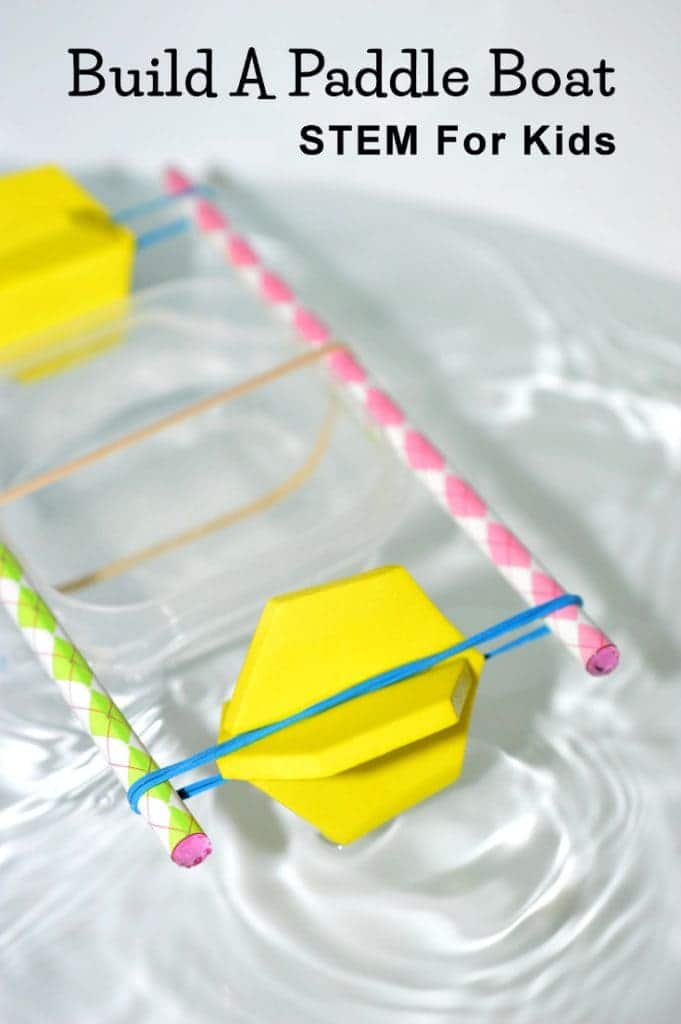
One of the coolest summer activities for kids is building a paddle boat.
Building a paddle boat is so easy and so much fun.
You can use it on a pond, in a pool or even in a bathtub.
Just use things you probably already have around the house.
We have chosen to use pencils, rubber bands and little foam shapes
Let’s get started.
.
How To Build A Paddle Boat
Here is how to make a paddle boat.
Materials
- shallow plastic container
- 3 large rubber bands
- 2 pencils / popsicle sticks
- cardboard, thick piece of paper or foam shapes
Tools
- large bucket or a "pond" for the boat to drive
- adult supervision
Instructions
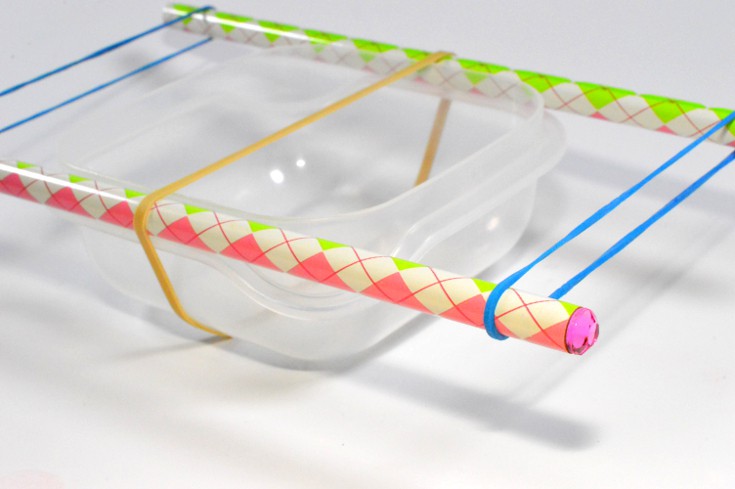
- Using a rubber band, wrap the two pencils onto the plastic container, one on each side.


- Put one more rubber band binding the two pencils behind the boat, and another one in front of the boat for balance.
- Cut the cardboard into 4 small pieces that are small enough to fit in the space between the two pencils.
- On each cardboard, make a cut in the middle but stop half the way (do not cut it all the way).
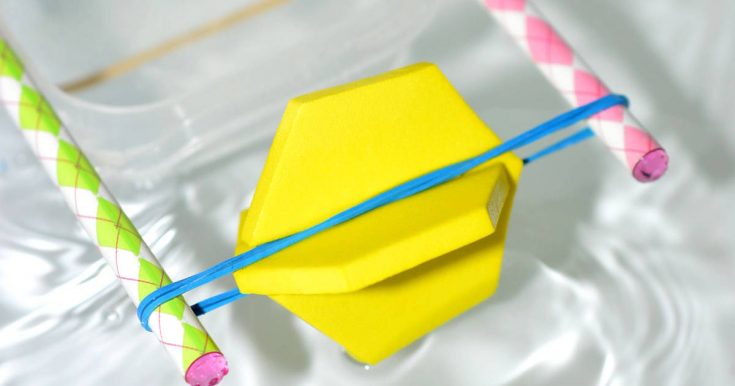
- Put 2 pieces of cardboard together by sliding one slit onto the other to make a rotating paddle. Do the same to the other 2.

- Fit the paddles onto the rubber bands.
- To make them rotate, twist the paddles on the rubber bands to wind them up.

- Although there are two paddle wheels, you can use only one of them or both. The second wheel is there for balancing the boat so it doesn't tilt. If you use both, be sure to turn both wheels in the same direction.
- Without releasing the twists, place the boat on the water and then let go.
- Observe which direction the boat goes.

Recommended Products
As an Amazon Associate, I earn from qualifying purchases.

You have just built a paddle boat! In a real paddle boat, the spinning drum of paddle boards acts as oars, pushing against the water as it rotates.
Paddle boats were widely used in the early 19th century as an unique form of marine transportation.
A steam engine was used to drive a paddle wheel for propulsion and so they were called steamboats.
In this experiment, the paddles were driven by the unwinding rubber band, which you manually winded before putting it into the water.
So the kinetic energy from your hand was converted into the potential energy in the winded rubber band, which in turned was converted into the kinetic energy of the band as it unwinds and the paddles move as a result.
Want more engineering projects?
Try one of these comprehensive engineering kits.
-
Kids First Boat Engineer Science Kit
-
6 Set STEM Kit,DC Motors Electronic Assembly Robotic Science Kits
-
LEGO Technic Racing Yacht 42074 Building Kit